Showing posts with label Work of My Hands. Show all posts

Sunday, 31 January 2016

Work of My Hands: Angular Scarf #1

So my newsagent had the 2016 Interweave Crochet Accessories magazine...


...and rather admired this Angular Scarf design by Darla J. Fanton (Ravelry link):

Angular-scarf-cross_small2

...and fished out a skein of Hawthorne Cottage  wool/nylon sock yarn (colourway 556, turquoise/grey) and a 4mm hook (yes, 4mm, the pattern recommends this and I'm going for a bit of drape.  I didn't swatch or try to achieve gauge, I'm just going to keep going till I'm up to yarn chicken time, and it will be the size it is)...


It's proving to be an easy pattern to remember and I'm making happy progress (I had to attend a number of meetings this week, and it came with me).

If your newsagent doesn't have the magazine, you can:

Truthfully, I have a bunch of WIPs.  I do crochet.  But it's good to share/record links to useful crochet things on this blog too, and there are waaaay more of them even than my rather epic collection of Works In Progress...

(I must do a Yarn Bowl post one day.  While I know there are beautiful timber/pottery artisan-made ones out there, I like repurposing op shop/Goodwill/Oxfam finds.  The one above is a small/medium size stainless steel mixing bowl.  Contains the yarn and lets it slide free very happily.)


Note: links are in US crochet terminology.


Tuesday, 26 January 2016

Modern Crochet 1 workshop (Knitters' Guild of NSW)


So there's this workshop on in March in Sydney 
...
(at the bargain price of $20 for members of the Knitters' Guild of NSW...) 
(which does include crocheters)...

It's not a learn-to-crochet class: it will be assumed that you know the stitches noted in the flyer.  The guild is looking at offering learn to crochet classes sometime this year.

So some class samples need to get done...


A blooming flower cushion... (see, I do actually crochet, not just blog about other crocheters!) 
(Yes, I do know you can thread the yarn through the holes of your colander yarn bowl, but I prefer the freedom of not doing this.  Each to their own! My best yarn bowls are op shop finds - hmmm, inspiration for another blog entry...)


Need to make another of these coin purses
(Since I gave this one away as a sample to the Red Cross ladies).


Note:INSTRUCTIONS in UK crochet terminology.


Monday, 25 January 2016

Crochet Purses

Some wonderful ladies at a knitting and crochet group I attend are constantly making items for the Red Cross fundraising stalls they hold regularly.

I saw this pattern and thought of them - simple to make, cool to look at, attractive to buy... and useful for children to transport little treasures, as they like to do.

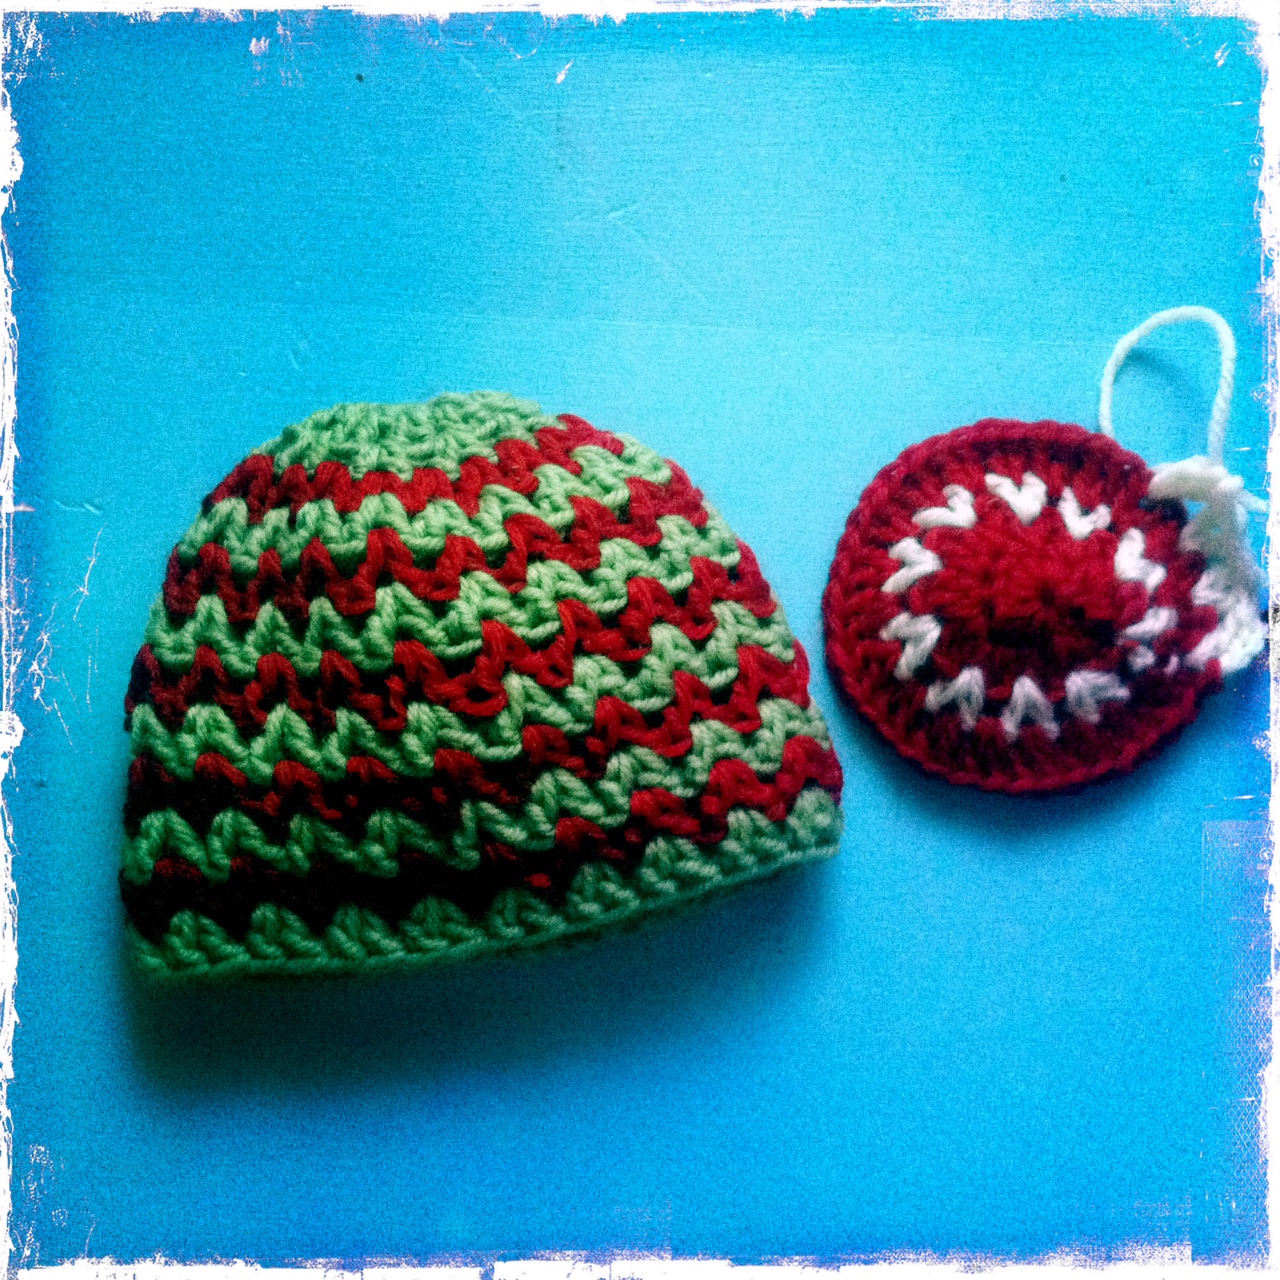
Image source: http://anisbee.canalblog.com/archives/2012/05/13/24247781.html

They're here on the creator's blog (in French): 

There's a detailed step by step photo tutorial here (in French):

And here on Ravelry:

If you do a Google Translate version of the tutorial, it's still a bit iffish to follow, because it's an automated translation that hasn't quite grasped crochet terminology.... (although I gather it's in US crochet terms).

So I wrote out a version of this in English (and UK terminology) for the Red Cross ladies. My French is spotty and school-level, but between the French, the photos and my trial and error... it's done.

The other sticking point* was the zips: for charity fundraising, zips at standard retail prices would add to the cost of making, and reduce the revenue going to the Red Cross.  But I lucked on a cache of small zips at several op shops and gave them to the ladies.  Any op shop with a haberdashery section probably has some zips, if you're looking....   (*sorry!)


Here's my English version: not for any kind of profiting, but just to help you if the photo tutorial isn't enough. If you're puzzled at any point, check back there first.

CROCHET MONEY PURSES (La porte-monnaie en crochet) 

Pattern in French with step by step photos:
version below is my English interpretation of that, to assist those bamboozled by French...

My introduction:

These look modern and crisp in light grey and dark grey with a neon stripe in orange or green or pink or yellow, but could also be done with scraps of yarn.
Both samples I made used Spotlight Marvel 8 ply acrylic yarn.  The grey/orange/grey one was done with a 4mm hook and has a denser fabric.  I tried one with a 6mm hook, which made a larger purse with looser texture: I prefer the 4mm hook version.  This isn’t an expensive yarn, but the result is pleasing in texture and colour: the double crochet works well.  One purse used about 30g of yarn.
I thought these would be good for a charity stall because they’re quick to make and have lots of uses, not just as a coin purse.  Kids often have stuff to carry – special toys etc (eg. little farm animals or dolls).
Below are my pattern notes.  Basically, you make a six-sided ‘circle’ with increases, then stop increasing and the rows become the sides of a circular bowl.  Sew in the zip and you have a purse/pouch…you might find there is also a market for the bowls, for bedside tables for change/watch/bits and pieces, too.
If you wanted to make larger bowls, you keep increasing the base (you’ll see below the pattern/maths of the increases) till you have the size you want, then make the sides.  As a bowl, the modern homewares look for these usually involves making these high enough so you can turn over the edges for an inch or so – which also gives a slightly more rigid edge to the bowl.

Instructions for the basic coin purse/pouch

I've used UK crochet terminology.  dc=double crochet   ch=chain (in US terms, sc and ch)

Start with a magic loop (so you can draw it tight and the coin purse doesn’t have a hole in the bottom.  Never an asset to a purse).  Use dark grey yarn.

Rows 1-9 are increasing rows. You start with 6 stitches and end up with 54.

Row 1: 2 ch (=1 dc), 5dc.  Join with a slip stitch.  Add a marker (eg. With yarn or a stitch marker) to note the beginning of the row.  Stitch count: 6

Row 2: 2 ch (=1 dc), 1 dc in the same place, 2 dc in each of the remaining dc.  Join with a slip stitch.  Stitch count: 12

Row 3: 2 ch (=1 dc), 1 dc in the same place, 1 dc in the next dc, *2 dc in the next dc, 1 dc in the next dc*.  Repeat from * * to the end.  Join with a slip stitch.  Stitch count: 18

Row 4: 2 ch (=1 dc), 1 dc in the same place, 1 dc in each of the next two dc, *2 dc in the next dc, 1 dc in each of the next two dc*.  Repeat from * * to the end.  Join with a slip stitch.  Stitch count: 24

Row 5: 2 ch (=1 dc), 1 dc in the same place, 1 dc in each of the next three dc, *2 dc in the next dc, 1 dc in each of the next three dc*.  Repeat from * * to the end.  Join with a slip stitch.  Stitch count: 30

Row 6: 2 ch (=1 dc), 1 dc in the same place, 1 dc in each of the next four dc, *2 dc in the next dc, 1 dc in each of the next four dc*.  Repeat from * * to the end.  Join with a slip stitch.  Stitch count: 36

Row 7: 2 ch (=1 dc), 1 dc in the same place, 1 dc in each of the next five dc, *2 dc in the next dc, 1 dc in each of the next five dc*.  Repeat from * * to the end.  Join with a slip stitch.  Stitch count: 42

Row 8: 2 ch (=1 dc), 1 dc in the same place, 1 dc in each of the next six dc, *2 dc in the next dc, 1 dc in each of the next six dc*.  Repeat from * * to the end.  Join with a slip stitch.  Stitch count: 48

Row 9: 2 ch (=1 dc), 1 dc in the same place, 1 dc in each of the next seven dc, *2 dc in the next dc, 1 dc in each of the next seven dc*.  Repeat from * * to the end.  Join with a slip stitch.  Stitch count: 54

This is the base of the purse.

Rows 10 – 28 make the sides of the purse.

Row 10: 2 ch (=1 dc), 1 dc in each dc, Join with a slip stitch.  Stitch count remains 54

Rows 11-15: As for Row 10.  2 ch (=1 dc), 1 dc in each dc, Join with a slip stitch.  Stitch count: 54.

Change to orange yarn

Rows 16-17: 2 ch (=1 dc), 1 dc in each dc, Join with a slip stitch.  Stitch count remains 54

Change to light grey yarn

Rows 18-28: 2 ch (=1 dc), 1 dc in each dc, Join with a slip stitch.  Stitch count remains 54

The crochet is finished.  Weave in the yarn ends. Pin in the zip and sew it with grey thread.  If it’s a little long, line up the top of the zip with one side of the purse and let the bottom of the zip sit down in the purse (see the grey example).  I used doubled thread and did a backstitch every fourth stitch or so for strength.  

See more of Sabine (annisbee) 's crochet on Ravelry - she has some lovely designs:


Note:INSTRUCTIONS in UK crochet terminology.


Note: links are in US crochet terminology.


Saturday, 23 January 2016

Spice of Life CAL: My Mexican Fiesta version


I am not alone in playing with the Spice of Life Crochet-A-Long.:  bright Mexican Fiesta kinda colours were my choice.  I'm using mostly yarn from Spotlight, 4 Seasons 50g wool, and about 18 colours (which is a few more than the original).  There are lots of pictures of completed blankets in a multitude of appealing colour combinations.

As I'm undertaking this with my local knitting and crochet group, I've got Motivation to Keep Up and finish it by June (we're doing a section each month, not weekly).

This is a clever pattern for crocheters both new and old, a chance to practise skills and develop new ones in the context of a blanket (it doesn't have to fit anyone but it will still keep 'em warm!).   The designer, Sandra Paul, notes on her blog the basic skills the blanket requires.

I would recommend reading both the designer's notes and the patterns.  While they are generously filled with links to tutorials and with photos to help you see how do do various stitches, there are sometimes notes on the blog that haven't been put in the pattern.  The pattern is free.

My other suggestion is to use the colour-exchange pages as a guide to the (not consecutively numbered) 129 rows.  And highlight the rows that are trebles.


There are also threads on Ravelry, Instagrammers with posts, a Facebook group - lots of options if you want to undertake this and engage on social media.


Note: links are in UK crochet terminology.


Monday, 18 January 2016

Pink Hat

As I told you back a little while in the blog entry about V-Stitch Chevron Beanies, that's a cool pattern.

And then a friend of mine became a grandmother, to the first girl born in their family in a while.  Cue  a sweet pink hat...


Pattern link: http://pinssneedles.com/free-crochet-pattern-quick-and-simple-chevron-hats-preemie-through-child-sizing/ (US terminology: instructions for various sizes) with photos and step by step instructions.

Pattern modifications: I crocheted the baby size in cotton/acrylic mix 8 ply yarn with a 4mm hook.  Didn't 'chevron' but had three colours of pink for a flowery effect (I hope).  Added several rows so it would have a brim, and added a picot edging which you can see in the detail brim photo.  Kinda invented the leaves.  Abandoned crochet for knitting for the i-cord 'stem', because knitted i-cord is faster and easier (and well-explained in many YouTube videos if you don't know how to do it).

Lucy at Attic24 has some tutorials on making crochet leaves, like this one.

(I've given it to them now, so I don't have it to hand any more to count rows or check any other details).

It's a bit of fun. I hope to see a photo of the little one wearing it.

UPDATE: and I have, and she looks very sweet.  And has some growing room in it...


Note:INSTRUCTIONS in UK crochet terminology.


Note: links are in US crochet terminology.


Friday, 15 January 2016

Katniss Cowl, Huntress Cowl, Hunger Games-inspired Cowl: texture and simplicity

There were many people inspired to replicate the grey cowl worn by Katniss in the Hunger Games films.  It's sometimes listed as 'huntress cowl' if you're searching for versions of it.

Friendly Red Fox has a version that isn't quite the original, but is a very wearable cowl - worn as one loop or two - with lovely surface texture using front and back post techniques.

http://www.thefriendlyredfox.com/2014/09/free-crochet-katniss-cowl-pattern.html

She shows how you can wear it three ways:

Image from link given above


At my knitting group meeting, there is an annual destash market day, where you can pick up some lovely yarn.  I acquired some Italian merino Aran/10ply yarn in orange, and it made up beautifully into my version of this pattern.  The one change I did was to start with a chainless foundation, so the edge would lie flat.


Note: links are in US crochet terminology.

Thursday, 14 January 2016

How to start crocheting without chain stitch: foundation crochet

Starting with a chain stitch is taught to pretty much every beginner crocheter, and is a hurdle to overcome because it's fiddly and annoying. And as many people chain more tightly than they do other crochet stitches, the beginning of your work can end up with a curling, tighter edge.

(If you HAVE to start with a chain, eg. for v-stitch, then use a larger hook size for the start - eg. if I'm using a 4mm hook, I'll go up to a 5mm hook for the chain and maybe first row).

BUT.... (let me change your life for the better!)

You don't have to start with a chain.  You can use a chainless foundation start (various other names for this: foundation chain, foundation treble etc etc).  What you are doing is creating the base (chain) and the first row (single/double/treble as you prefer) in one go.  In forming each stitch, you make the chain base for the next stitch, then make the stitch you're on.  Chain/stitch/chain/stitch.


Here's a You Tube video - it's in US terms, so it says double crochet where UK term is treble crochet, but it illustrates how it's done.


And here's a step by step photo tutorial, from a UK blogger so it's in UK terms.


It's a really good technique for getting an easier start and less curling. It also gives you a nicer bottom edge than working through the chain can do.

You can do it with double/treble stitches (UK terms) or single/double stitches (US terms).  Or longer stitches (double treble, triple treble etc) if that's what your work requires.

Here's my other tip: staying aware of keeping your stitches level so the bottom edge of your work stays straight.  Keep your stitches at right angles, even if it feels that first loop is loopier than you expect.


It may take you a couple of tries to 'see' what you're doing, but when you do (and you will), it's an excellent technique to have in your bag of tricks.


Note: links are in US crochet terminology.


Note: links are in UK crochet terminology.

Tuesday, 5 January 2016

V-stitch crochet: getting started

I've probably jumped the gun by posting about the V-stitch beanies at Christmas...but if you haven't yet come across V-stitch crochet, you really should. (Sometimes you're lucky enough to be doing V-stitch in a peaceful garden like this one...).


Why is V-stitch cool?  It's simple.  Just treble (UK; dc in US terms) and if you wish chain.  But secondly, it has some stretch.  Crochet can be rigid due to the way in which stitches are formed, and this isn't necessarily a bad thing.  But one of the charms of V-stitch is that it drapes and stretches due to the angle of the stitches.

Here's one tutorial from My Merry Messy Life (US terms):
http://mymerrymessylife.com/2012/06/crochet-v-stitch-tutorial-free-crochet-tutorial.html
This tutorial has detailed step by step photos.  Her version has treble/chain/treble in each space (UK terms.  In US terms, dc/chain/dc).  This adds stretch due to the chain, and makes a slightly more open style of crochet.

Here's another tutorial from Red Heart yarns (US terms):
http://blog.redheart.com/how-to-crochet-classic-dc-v-stitch-plus-3-variations/
One of the version here eliminates the chain so in each space there's treble/treble (UK terms.  In US terms, dc/dc).  This is faster to work and makes a slightly less open crochet 'fabric'.  I'm making a version of this, and have chosen to go up one hook size to 5mm with the 8 ply wool, so it still has drape and stretch. (This is the blanket in the photo above).

Having worked on a couple of V-stitch blankets, the one thing I have decided I prefer is to have a single straight stitch (treble in UK terms, dc in US terms) at each end so the sides are straight.  It's a stitch at the end of a row, 3 chains at the start of a row.  If you start and end with a V-stitch you'll have zigzag sides.  If you're happy with that, dandy: if you want straight sides, begin and end with a single stitch.


Note: links are in US crochet terminology.


Saturday, 26 December 2015

V-stitch Beanies

The knitters' and crocheters' guild I attend decided to supply the local NICU with Christmassy beanies this year.  I went hunting for a crochet pattern and lucked onto this excellent one:

http://pinssneedles.com/free-crochet-pattern-quick-and-simple-chevron-hats-preemie-through-child-sizing/ (US terminology: instructions for various sizes)

V-stitch has the advantage of having some stretch (some crochet can be more rigid than knitting) and the cheery chevron adds to the effect (I carried the colours up so only had four ends to work in).

Here are two I made:


Two more were made for newly-grannied friends.  The baby size only took a couple of hours to make.  I made some in soft merino wool and some in cotton blend yarn, all 8 ply, 4mm hook.

Our group gave over seventy beanies - how lovely to think of those little ones with warm Christmassy heads.


Note: links are in US crochet terminology.


Wednesday, 23 December 2015

Moss stitch

The background for the blog( at present anyway) is a moss stitch blanket I'm crocheting.  I'm using a wide variety of colours and brands in 8 ply cotton and cotton blend yarns, and a 5mm crochet hook.


I was inspired by this tutorial:
http://madebymriek.blogspot.com.au/2013/06/moss-stitch-tutorial.html

And if you want to try it, she has instructions in English and step by step photos.

In UK crochet terms, once you've started it's just dc, chain, dc, chain.  Lovely easy mindless chugalong crochet. The random colours add to its charm.

If you work it in one colour, then it's the same both sides.  As I'm starting a new colour for each row, one side is different to the other as I'm always starting at the same end (as opposed to turning and carrying on with the same colour).

My plan is a blanket around 60 inches square (100dc in each row). Colour choice for each row is pretty much random; sometimes I'm asking someone nearby to pick the next colour when I get to the end of the row.  At a social gathering the other day I had plenty of people to ask; and even ended up showing one of the other people how to crochet - she thought she'd forgotten. And remembered, and thought she might try it again...

In a smaller size, this has excellent scope as a baby blanket using odds and ends of yarn.


Note: links are in US crochet terminology.